Friday, October 18, 2019

First sheath from new tooling

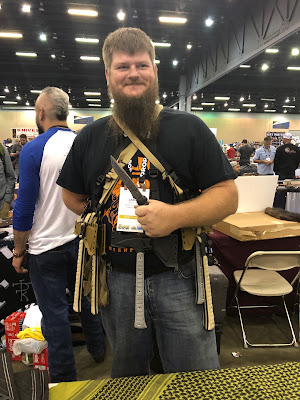
The first sheath off of the new tooling ready to ship out to a very patient customer.  15" Wrecker, sharpened inner beard, Boltaron sheath, quick-detach shoulder sling.


The first sheath off of the new tooling ready to ship out to a very patient customer.  15" Wrecker, sharpened inner beard, Boltaron sheath, quick-detach shoulder sling.

[url=https://flic.kr/p/2hwYH2b][img]https://live.staticflickr.com/65535/48920959976_9e0ae55f1c_c.jpg[/img][/url][url=https://flic.kr/p/2hwYH2b]bob01[/url] by [url=https://www.flickr.com/photos/148294846@N06/]James Helm[/url], on Flickr

[url=https://flic.kr/p/2hwVXQ7][img]https://live.staticflickr.com/65535/48920424458_639a5cd0c7_c.jpg[/img][/url][url=https://flic.kr/p/2hwVXQ7]bob02[/url] by [url=https://www.flickr.com/photos/148294846@N06/]James Helm[/url], on Flickr

[url=https://flic.kr/p/2hwZL5e][img]https://live.staticflickr.com/65535/48921165357_70266fe0af_c.jpg[/img][/url][url=https://flic.kr/p/2hwZL5e]bob03[/url] by [url=https://www.flickr.com/photos/148294846@N06/]James Helm[/url], on Flickr

Thursday, October 17, 2019

Sheath tooling upgrade

We experimented with vacuum forming sheaths and were not giving the level of retention needed to hold a tomahawk securely in a bottom-eject sheath, so we cut a new mold to be used under my hydraulic forging press.

The material is 3/4" HDPE.


The design allows for molding both sides at once, an improvement on the one half at a time design of my old molds.  I'm using .08" Boltaron for the sheaths.


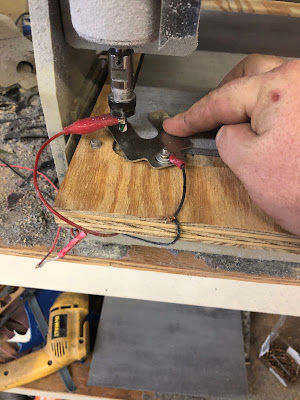
Trimming is done on a holding fixture in the CNC router, which is also what was used to make the mold.


The completed and assembled sheath.


By comparison, one of my old molds and trim jig.  They're pieced together from waterjet cut pieces.  The mold is one of a pair, since it only molds one half of the sheath.  The trim jig holds both halves of the sheath at once, but mounting them was always aggravating.  Holes were hand -drilled, slots were cut with a Dremel in a router table attachment, excess material trimmed with a bandsaw, and the profile trimmed on a router with a bearing bit.  The CNC router does all of that more quickly, safely, and consistently. 


Wednesday, September 25, 2019

Customer photos

One of my 12" Woodsman 'hawks. 1/4" 80CrV2 steel, Cerakote, and new tan TeroTuf handle slabs.


And customer photos clearing around some trail cameras. He tells me he'll be clearing a shooting lane through oak and cedar with it soon.


Wednesday, September 18, 2019

Dealers

Mid-tech tomahawks, knives, and self defense tools are available directly from these fine dealers:


Blue Line Gear

Tactical Elements

New Graham Knives

While I'm working to build more inventory more quickly, it will be far quicker to buy what is already in stock from a dealer than wait for me to be able to work my way down the list to yours.

Saturday, June 15, 2019

Putting more "tech" in the mid-tech line

For a while now, I've been partnered with JB Knife and Tool working to add more "tech" into my mid-tech line of knives and tomahawks.  With shared work space, tooling, and expertise, we are working together to bring a greater quantity of high quality blades to meet our various customers' needs.

The most recent fruit of our combined efforts can be seen in my upgraded tomahawks.  The batch put together for the Blade Show and for Blue Line Gear, in addition to slightly wider tangs, a switch to 80CrV2 steel, and Cerakote, featured the first handle scales I've shaped with a CNC router and the first sheaths to have holes, slots, and outline cut with a CNC router.  As a result, I was able to add new texture to the TeroTuf scales for extra grip upon Ryan Johnson of Blue Line Gear's request (something that I like and will make standard on my 'hawk handles) and produce a larger batch in less time than I've previously been able to do.

Here's a look behind some of the process to build the tomahawks in this batch.

It began with my first batch of blanks to be waterjet cut directly by my steel supplier, the New Jersey Steel Baron.  I did not build all of these for the Blade Show, only 27.  :D


Someone on Facebook commented about them having nothing to do with blacksmithing and added "Add a handle and your [sic] done..." followed by a sad face.  That shows very little understanding of what it takes to build a quality blade, even using modern methods. 
 
I drilled out all the rivet holes to size, countersunk them slightly, and broke all sharp edges on the blanks where they would be comfortable to handle anywhere without digging into your hand.  Then I set up my new DD Work Rest for the main bevels and a homebrewed work rest for the spikes, marked my centers and grind lines, and got to grinding.


Next up was hardening and tempering.  Here are 11 of the 27 'hawks in for their first tempering cycle.


After that they took a trip to Cradin Industries for Cerakote.  After picking them up, I laser engraved my touchmark using a sophisticated positioning fixture.


The handles slabs are whittled out of a sheet of TeroTuf with a CNC router.  This requires three tool changes per sheet, after which it must be re-zeroed each time.


While the router was working, I cut the stainless steel tube rivets, which can be seen in the little tub.


After molding Boltaron sheaths, we used a cobbled-together holding fixture to drill the holes and slots and trim the outside of the shells.  A better fixture will be used in future batches.


After that, it was time to assemble and sharpen everything.


A box for Blue Line Gear...


...and a box for my table.


We built and installed shoulder slings while traveling to the show and at the show tables themselves.  I made my delivery over to the Blue Line Gear booth in two trips.


Wednesday, January 23, 2019

ST-1 self-defense tools

I came up with a self-defense tool that debuted at Blade Show this summer:  the ST-1.  They're waterjet cut from 1/4" 4140, ground and heat treated, with a Cerakote ceramic gun coating, with Boltaron sheaths.


  There's no blade, but the tip is quite pointy and beveled.


A closer look at the tip prior to heat treatment and Cerakote.


More details in this video:


As Tobin demonstrates, they can even be quad-wielded.  :D


These are available at Blue Line Gear .